Are you ready to transform your ordinary gin and tonic into an extraordinary sensory experience? While store-bought tonic waters offer convenience, they often come laden with artificial flavors, high-fructose corn syrup, and a generic taste that can overshadow the subtleties of your favorite gin. Imagine a tonic water perfectly tailored to your palate, with vibrant natural flavors and a refreshing bitterness that elevates every sip. Making your own tonic water at home might seem like a complex endeavor, but with a few key ingredients and a simple process, you can unlock a world of bespoke G&T possibilities. This guide will walk you through everything you need to know, from selecting the right botanicals to mixing the perfect drink, ensuring your homemade tonic water becomes the star of your cocktail repertoire.
|
Our Picks for the Best Soda maker in 2026
As an Amazon Associate I earn from qualifying purchases.
|
||
| Num | Product | Action |
|---|---|---|
| 1 | SodaStream Terra Sparkling Water Maker Bundle in Black - includes 3-Pack CO2 and Carbonating Bottle |

|
| 2 | Soda Siphon 1L,Portable Sparkling Water Maker,Compact Carbonated Water Machine for Flavored Drinks Reusable Beverages Machine Kit,Travel Soda Machine for Home & Outdoor |
|
| 3 | SodaStream - Terra Soda Streaming Machine - STARTER KIT - Sparkling Water Maker with CO2 & Bubly Drop - Eco-Friendly, No Batteries Needed - Black |
|
| 4 | Ninja Thirsti Drink System, Soda Maker, Create Unique Sparkling and Still Drinks, Personalize Size and Flavor, Carbonated Water Machine, 60L CO2 Cylinder, Variety of Flavors, Color Black (model 1001) |
|
| 5 | Philips Sparkling Water Maker ADD4901BKOQ/37, Plastic Soda Streaming Machine with Quick Twist Bottle, 1L BPA free PET Carbonating Bottle, Soda Maker Compatible with 60L CO2 Carbonator (NOT Included) |
|
| 6 | Mysoda Ruby 2 Sparkling Water Maker - Soda Streaming Machine Silent Carbonated Water Machine Robust Long-Lasting Aluminium Soda Maker 1L Water Bottle Without CO2 Cylinder - Black Copper Soda Machine |
|
| 7 | Black Stainless Steel Sparkling Water Maker Soda Machine Includes 1L Stainless Steel Black Bottle and 1 C02 Cylinder |
|
| 8 | Philips Sparkling Water Maker, Soda Streaming Machine with Quick Twist Bottle, 1L BPA free PET Carbonating Bottle, Soda Maker Compatible with 60L CO2 Carbonator (NOT Included), ADD4902BKOQ/37 |
|
| 9 | SodaStream - Terra Sparkling Water Maker - VALUE BUNDLE - CQC CO2 system - Includes 2x CO2 Cylinders, 3x 32 Fl Oz Dishwasher Safe Bottles, 2x Bubly Flavor Drops - Combine with Pepsi Flavors - Black |
|
| 10 | Philips Soda Streaming Machine, Stainless Sparkling Water Maker Easy Install with Quick Twist 1L PET Carbonating Bottle, Soda Maker Compatible with 60L CO2 Carbonator (NOT Included), ADD4902BKOQ/37 |
|
The Allure of Homemade Tonic Water: Beyond the Bottle
Tonic water’s distinctive bitter taste comes from quinine, a compound originally derived from the bark of the Cinchona tree. Historically, British officers in colonial India mixed quinine with sugar and water to ward off malaria, eventually adding gin to make it more palatable – thus, the gin and tonic was born. Today, commercial tonic waters often use synthetic quinine and a range of sweeteners and preservatives.
Choosing to make your tonic water offers several compelling advantages. First, you gain complete control over the ingredients, allowing you to avoid artificial additives and excessive sugar. This means a healthier, more natural mixer. Second, homemade tonic empowers you to customize the flavor profile. You can adjust the level of bitterness, citrus notes, and introduce a spectrum of aromatic botanicals to complement specific gins or suit your personal preferences. The depth and complexity of a fresh, homemade tonic syrup are unparalleled, offering a truly artisanal touch to your craft cocktails that store-bought options simply can’t match.
It’s important to distinguish between tonic syrup and tonic water. Homemade preparations typically yield a concentrated tonic syrup, which is then diluted with carbonated water (like club soda or seltzer) to create the final tonic water. This syrup format allows for longer storage and enables you to mix fresh tonic water on demand.
Essential Ingredients for Crafting Your Tonic Water
Crafting homemade tonic water relies on a few key components that contribute to its unique flavor, bitterness, and aromatic complexity. Understanding each ingredient’s role is crucial for balancing your perfect batch.
The Star: Cinchona Bark (Quinine Source)
The bitter backbone of tonic water comes from quinine, naturally present in Cinchona bark. This is the most crucial and unique ingredient you’ll need.
- Types: Cinchona bark is available in either powdered or cut (chipped) form. Powdered bark offers a more potent extraction of quinine but can be challenging to strain, sometimes leading to a cloudy syrup. Cut bark is easier to strain but might require a longer steeping time to extract sufficient bitterness. Yellow Cinchona bark is often preferred for its milder flavor compared to red Cinchona bark, which can be more floral or earthy.
- Safety Notes: While quinine is generally safe in the small amounts found in tonic water, Cinchona bark contains higher concentrations and can have powerful effects. Individuals sensitive to quinine should exercise caution. Homemade tonic is intended for culinary purposes, not medicinal use. Do not over-concentrate the bark, and always use it responsibly.
- Where to Buy: Cinchona bark can be found at specialty herbal shops, online apothecaries, or some bulk spice retailers.
Citrus Zest and Juice (Flavor & Acidity)
Citrus provides the bright, refreshing notes and acidity essential for balancing the bitterness of quinine.
- Fresh Citrus: Limes, lemons, and oranges are commonly used. Their zest contains aromatic oils that impart vibrant flavor, while their juice contributes tartness. Always use organic, unwaxed fruit when possible, and only the colored part of the zest, avoiding the bitter white pith.
- Citric Acid Powder: This food-grade acid is a concentrated source of tartness, providing a consistent and clean acidic profile that fresh juice alone might not achieve. It also helps preserve the syrup.
Sweeteners (Balancing Bitterness)
To make the tonic palatable, a sweetener is necessary to balance the intense bitterness of the quinine and the tartness of the citrus.
- Granulated Sugar: Standard white granulated sugar is the most common choice, providing a neutral sweetness that allows other flavors to shine.
- Agave Syrup: A good alternative for a slightly different flavor profile and can dissolve easily.
- Honey: Can be used, but note that its distinct flavor will influence the final taste of your tonic.
Aromatic Botanicals and Spices (Complexity)
These ingredients are where you can truly experiment and customize your tonic water, adding layers of aromatic complexity.
- Common Choices: Lemongrass, cardamom pods, allspice berries, black peppercorns, coriander seeds, fennel seeds, juniper berries, and angelica root are popular additions.
- Experimentation: The beauty of homemade tonic lies in its adaptability. Consider botanicals that complement your favorite gin – for example, a gin with prominent citrus notes might pair well with additional orange peel, while a more herbal gin could benefit from rosemary or thyme.
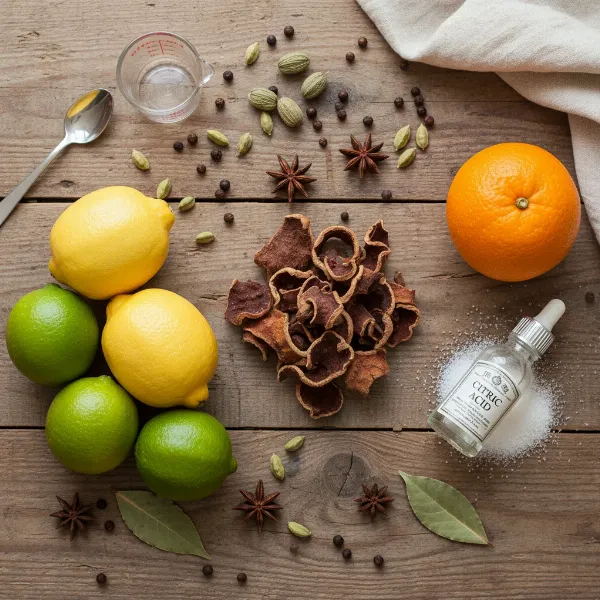 key ingredients for crafting homemade tonic water including cinchona bark and citrus
Step-by-Step Guide to Making Homemade Tonic Syrup
Creating your own tonic syrup is a rewarding process. Here’s a general recipe that combines best practices from various sources, focusing on balance and clarity.
Equipment You’ll Need:
- Medium saucepan
- Fine-mesh sieve
- Cheesecloth or coffee filters (essential for straining)
- Measuring cups and spoons
- Sterilized glass bottles or jars for storage
Ingredients for a Basic Tonic Syrup:
- 4 cups water
- 1/4 cup Cinchona bark (cut or powdered, preferably yellow)
- Zest of 1 large lemon, 1 lime, and 1/2 an orange (avoiding pith)
- 1 stalk lemongrass, roughly chopped
- 1 tablespoon whole allspice berries
- 1 teaspoon black peppercorns
- 1 teaspoon coriander seeds
- 1/4 cup citric acid powder
- 2 cups granulated sugar (or to taste)
- Freshly squeezed juice of 1 lemon and 1 lime
Instructions:
- Combine Botanicals: In your saucepan, combine the 4 cups of water, Cinchona bark, citrus zests, chopped lemongrass, allspice, peppercorns, and coriander seeds.
- Simmer and Steep: Bring the mixture to a gentle simmer over medium heat. Reduce heat to low, cover, and let it simmer for about 20-30 minutes. If using cut bark, you might extend this to 45-60 minutes to ensure full flavor extraction. Avoid a rolling boil, which can extract unwanted bitter compounds.
- Cool and Strain (Crucial Step): Remove the saucepan from the heat and let the mixture cool completely, allowing the flavors to meld further. This can take 1-2 hours. Once cooled, strain the mixture through a fine-mesh sieve lined with several layers of cheesecloth or a coffee filter. This step is critical to remove all solids, especially if using powdered cinchona bark, to prevent a muddy or cloudy syrup. You may need to strain it multiple times for maximum clarity. Squeeze the cheesecloth gently to extract all liquid, but avoid overly aggressive squeezing, which can release more bitter compounds.
- Sweeten and Acidify: Pour the strained liquid back into the clean saucepan. Add the granulated sugar, citric acid powder, lemon juice, and lime juice. Heat gently over low heat, stirring constantly, until the sugar is fully dissolved. Do not boil.
- Taste and Adjust: Taste a small amount of the concentrated syrup (dilute a tiny bit with plain water to get a better sense of the final flavor). Adjust sweetness or acidity as needed. If you desire a stronger citrus kick, you can add a bit more fresh juice. If it’s too bitter, more sugar will balance it.
- Bottle and Store: Once the sugar is dissolved and the flavor is to your liking, remove from heat and let the syrup cool completely. Pour the cooled tonic syrup into sterilized glass bottles. Store in the refrigerator. It should last for 2-4 weeks.
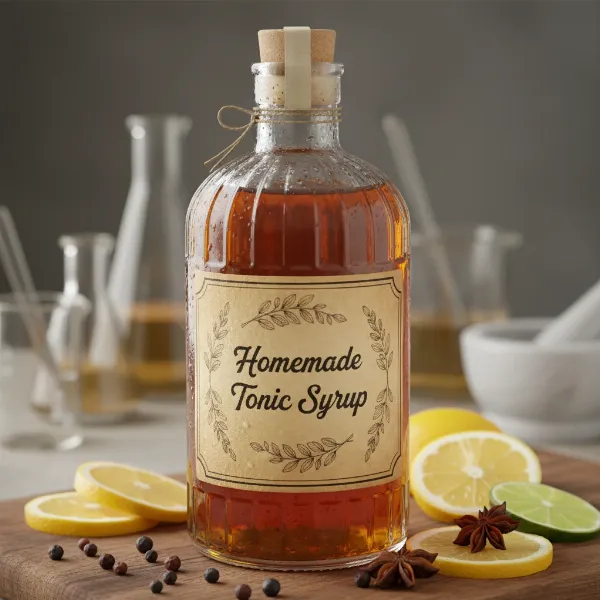 clear amber homemade tonic syrup in a glass bottle with fresh citrus slices
From Syrup to Sparkling: Assembling Your Gin and Tonic
Now that you have your homemade tonic syrup, it’s time to create the ultimate gin and tonic. The key is in the dilution and personalization.
Dilution Ratios and Best Practices
Homemade tonic syrup is highly concentrated, so it needs to be mixed with carbonated water. A common starting ratio is 1 part tonic syrup to 3-4 parts carbonated water. However, this is purely a guideline, and you should adjust to your preference and the specific characteristics of your syrup.
- Individual Servings: Always mix the tonic syrup with carbonated water for individual drinks. Do not pre-mix large batches of tonic water, as the carbonation will dissipate quickly.
- Mixing: For a standard Gin and Tonic, start with 1.5 to 2 ounces of gin, 0.75 to 1 ounce of tonic syrup, and 3 to 4 ounces of carbonated water. Fill a glass with ice, add gin, then the tonic syrup, and top with carbonated water. Stir gently to combine.
Choosing Carbonated Water
The type of carbonated water you use can impact the final drink.
- Club Soda: Often contains added minerals, which can subtly enhance the overall flavor.
- Seltzer Water: Generally plain carbonated water, offering a clean, neutral base.
- Sparkling Water: Can vary in mineral content and carbonation level.
Choose a carbonated water with a robust effervescence to ensure a lively, refreshing G&T.
Pairing with Gin
One of the greatest joys of homemade tonic is the ability to tailor it to your gin.
- Citrus-Forward Gins: Might benefit from a tonic syrup with slightly less added citrus, or one with complementary herbal notes like rosemary.
- Floral Gins: Consider a tonic with subtle floral aromatics like a hint of rosewater or lavender.
- Spicy/Juniper-Heavy Gins: A tonic syrup with warming spices like cardamom or black pepper can create a harmonious blend.
Experimentation is key! Make small batches of different tonic syrups or vary the botanical additions to find your perfect gin-pairing match.
Troubleshooting and Tips for Perfect Homemade Tonic
Even with a reliable recipe, a few common issues can arise. Here’s how to troubleshoot and refine your homemade tonic water.
Common Issues and Solutions
- Cloudy Syrup: This is usually due to insufficient straining. Fine particles of Cinchona bark or other botanicals remain. To fix this, re-strain the cooled syrup through a fresh coffee filter or a very fine piece of cheesecloth. Patience is key for clear results.
- Too Bitter: If your tonic syrup is overwhelmingly bitter, you might have simmered the Cinchona bark for too long or used too much. To balance, you can dilute the syrup slightly with simple syrup (equal parts sugar and water) or add more sweetener (sugar, agave) directly to your syrup.
- Not Bitter Enough: If the quinine flavor is too subtle, next time, slightly increase the amount of Cinchona bark or extend the simmering time (carefully, by 5-10 minutes at a time) during the initial extraction phase.
- Lacking Brightness: This often indicates a need for more acidity or fresh citrus zest. Add a little more citric acid or fresh lemon/lime juice to taste.
Adjusting Flavor and Customization
- Balance is Key: The perfect tonic syrup strikes a balance between bitterness, sweetness, and acidity. Always taste and adjust incrementally.
- Infusion Times: Delicate botanicals like cucumber or mint can be infused after the main simmer, letting them steep in the cooling liquid for a shorter period (e.g., 15-20 minutes) to avoid over-extraction.
- Spice Variations: Beyond the basic recipe, consider star anise, ginger, or even a touch of chili for a unique kick.
Storage and Shelf Life
- Refrigeration: Homemade tonic syrup should always be stored in an airtight, sterilized glass bottle in the refrigerator.
- Shelf Life: Typically, it will last for 2-4 weeks. The citric acid and sugar act as natural preservatives, but without commercial preservatives, its shelf life is limited. Discard if you notice any off-smells, mold, or significant changes in color or consistency.
- Freezing: For longer storage, you can freeze tonic syrup in ice cube trays. Once frozen, transfer the cubes to a freezer-safe bag. Thaw as needed.
“The true magic of a gin and tonic lies not just in the gin, but in the freshness and balance of its tonic. Crafting your own allows for an unparalleled expression of flavor and a deeply personal touch.” – Admin, Sodamakerpro.com
Conclusion
Embarking on the journey of making your own tonic water for gin and tonics is a rewarding adventure that promises to elevate your cocktail game. By taking control of the ingredients, you not only ensure a more natural and healthier mixer but also unlock a world of personalized flavors that commercial options simply cannot provide. From the distinctive bitterness of cinchona bark to the vibrant zest of fresh citrus and an array of aromatic botanicals, each component plays a vital role in crafting a tonic syrup that is uniquely yours.
So, gather your ingredients, follow the steps, and don’t be afraid to experiment with different spice combinations or citrus profiles. The perfect gin and tonic is within your reach, allowing you to create memorable drinks that truly reflect your taste. Why settle for generic when you can sip on exceptional?
Frequently Asked Questions
What is the primary ingredient that gives tonic water its bitter taste?
The primary ingredient responsible for tonic water’s characteristic bitter taste is quinine, which is naturally extracted from the bark of the Cinchona tree. This botanical provides the distinct flavor profile that defines tonic water.
Can I make homemade tonic water without Cinchona bark?
While you can make flavored syrups with citrus and spices, it won’t be true tonic water without Cinchona bark, as Cinchona is the source of quinine, which provides the essential bitter flavor that defines tonic.
How long does homemade tonic syrup last in the refrigerator?
Homemade tonic syrup, when stored in a sealed, sterilized glass bottle in the refrigerator, typically lasts for about 2 to 4 weeks. Its shelf life is shorter than commercial varieties due to the absence of artificial preservatives.
Is homemade tonic water safe to drink?
Yes, homemade tonic water is safe to drink when prepared correctly and consumed in moderation. It’s crucial to use Cinchona bark responsibly and not exceed recommended amounts, as high concentrations of quinine can have adverse effects, especially for individuals with sensitivities. It’s for culinary enjoyment, not medicinal use.
What kind of carbonated water should I use with tonic syrup?
For the best results, use a good quality, highly carbonated club soda or seltzer water. The choice often comes down to personal preference; club soda sometimes has added minerals that can enhance flavor, while seltzer is typically a more neutral base.
Can I adjust the sweetness of my homemade tonic syrup?
Absolutely. One of the main benefits of making your own tonic syrup is the ability to customize its sweetness. You can add more or less sugar during the heating step, or even adjust it per drink by adding a splash of simple syrup to your finished G&T.
Why is my homemade tonic syrup cloudy?
Cloudiness in homemade tonic syrup is most often caused by insufficient straining. Fine particles from the Cinchona bark or other botanicals can remain suspended in the liquid. To achieve a clear syrup, ensure you strain the mixture through multiple layers of cheesecloth or a coffee filter, potentially repeating the process.