Few things are as frustrating as reaching for a refreshing glass of sparkling water, only to find your soda maker spraying water or hissing gas from its nozzle. A leaking soda maker nozzle can be messy, wasteful, and a sign that your favorite appliance isn’t working at its best. Fortunately, many common leaks are simple to diagnose and fix, often in just a few minutes, without the need for complex tools or costly repairs. This guide, drawing on over a decade of hands-on experience with soda makers, will walk you through quick, effective steps to identify and resolve those pesky leaks, getting you back to bubbly beverages in no time.
Pinpointing the Problem: Why Your Soda Maker Nozzle Leaks
Before you can fix a leak, understanding its origin is key. A soda maker’s nozzle area is where the magic happens, but it’s also where several components meet under pressure, making it a common site for issues. Leaks typically stem from either mechanical failures like worn seals or user-related errors.
Common Culprits Behind a Leaky Nozzle
Leaks often arise from specific points within the soda maker’s design:
- Worn or Dirty Seals: The most frequent cause. Rubber O-rings, gaskets, or washers around the bottle connection point, CO2 cylinder connection, or inside the nozzle assembly can wear out, become dislodged, or accumulate mineral deposits and debris, compromising the seal.
- Loose Connections: Over time, vibrations or repeated use can cause nuts or fittings within the nozzle assembly or where the CO2 cylinder connects to loosen, creating small gaps for liquid or gas to escape.
- Cracked Components: While less common for a quick fix, a cracked diffuser (a small part inside some nozzles) or other plastic components can lead to leaks, especially if the machine has been dropped or handled roughly.
- Sticking Plunger/Valve: In some models, the mechanism that presses against the CO2 cylinder might not fully retract after carbonation, keeping pressure on the cylinder and causing continuous gas leakage.
- Faulty CO2 Cylinder Valve: Sometimes, the problem isn’t the machine but the cylinder itself. A defective cylinder might release gas too rapidly, overwhelming the system and causing leaks around the nozzle.
|
Our Picks for the Best Soda maker in 2026
As an Amazon Associate I earn from qualifying purchases.
|
||
| Num | Product | Action |
|---|---|---|
| 1 | Philips Sparkling Water Maker ADD4901BKOQ/37, Plastic Soda Streaming Machine with Quick Twist Bottle, 1L BPA free PET Carbonating Bottle, Soda Maker Compatible with 60L CO2 Carbonator (NOT Included) |

|
| 2 | Ninja Thirsti Drink System, Soda Maker, Create Unique Sparkling and Still Drinks, Personalize Size and Flavor, Carbonated Water Machine, 60L CO2 Cylinder, Variety of Flavors, Color Black (model 1001) |
|
| 3 | Philips Soda Streaming Machine, Stainless Sparkling Water Maker Easy Install with Quick Twist 1L PET Carbonating Bottle, Soda Maker Compatible with 60L CO2 Carbonator (NOT Included), ADD4902BKOQ/37 |
|
| 4 | Soda Siphon 1L,Portable Sparkling Water Maker,Compact Carbonated Water Machine for Flavored Drinks Reusable Beverages Machine Kit,Travel Soda Machine for Home & Outdoor |
|
| 5 | Philips Sparkling Water Maker, Soda Streaming Machine with Quick Twist Bottle, 1L BPA free PET Carbonating Bottle, Soda Maker Compatible with 60L CO2 Carbonator (NOT Included), ADD4902BKOQ/37 |
|
| 6 | SodaStream - Terra Sparkling Water Maker - VALUE BUNDLE - CQC CO2 system - Includes 2x CO2 Cylinders, 3x 32 Fl Oz Dishwasher Safe Bottles, 2x Bubly Flavor Drops - Combine with Pepsi Flavors - Black |
|
| 7 | Mysoda Ruby 2 Sparkling Water Maker - Soda Streaming Machine Silent Carbonated Water Machine Robust Long-Lasting Aluminium Soda Maker 1L Water Bottle Without CO2 Cylinder - Black Copper Soda Machine |
|
| 8 | SodaStream - Terra Soda Streaming Machine - STARTER KIT - Sparkling Water Maker with CO2 & Bubly Drop - Eco-Friendly, No Batteries Needed - Black |
|
| 9 | SodaStream Terra Sparkling Water Maker Bundle in Black - includes 3-Pack CO2 and Carbonating Bottle |
|
| 10 | Black Stainless Steel Sparkling Water Maker Soda Machine Includes 1L Stainless Steel Black Bottle and 1 C02 Cylinder |
|
User Errors That Cause Leaks
Often, leaks are not due to a faulty machine but rather how it’s being used:
- Improper Bottle Insertion: The carbonating bottle must be correctly seated and secured according to your model’s instructions. A misaligned or loosely attached bottle will prevent a proper seal, leading to water and gas leaks during carbonation.
- Overfilling: Exceeding the “fill line” on your carbonating bottle is a guaranteed way to cause an overflow or leak as the carbonation process increases the liquid volume.
- Carbonating Flavored Liquids: Soda makers are designed to carbonate plain water only. Adding syrups or concentrates before carbonation can cause sticky residue, clogs, and pressure issues that lead to leaks, as well as damage your machine.
- Incorrect Carbonation Technique: Applying too much pressure for too long, or not releasing the carbonation button/lever in short bursts, can build excessive pressure, forcing water out of the nozzle or pressure relief valve.
Essential Pre-Fix Steps: Safety and Preparation
Before attempting any repairs, always prioritize safety. Working with pressurized devices requires caution.
- Disconnect Power: If your soda maker is electric, unplug it from the power outlet.
- Remove CO2 Cylinder: Carefully unscrew and remove the CO2 cylinder. This depressurizes the primary gas source.
- Remove Carbonating Bottle: Take out the carbonating bottle, discarding any water that might be left inside.
- Clear Workspace: Ensure you have a clean, well-lit area to work on your machine.
Gather Your Quick-Fix Toolkit
For most 5-minute fixes, you won’t need many specialized tools. Have these items handy:
- Clean Cloth or Paper Towels: For wiping down surfaces and drying parts.
- Small Flathead Screwdriver: Useful for gently prying up or adjusting seals.
- Food-Grade Lubricant (e.g., silicone grease): Can help improve the seal and longevity of O-rings.
- Crescent Wrench or Soft-Jaw Pliers (optional): For tightening any accessible nuts or connections, especially if your model has external fittings.
Your 5-Minute Fix: Step-by-Step Nozzle Repair
With safety measures in place and your tools ready, let’s tackle that leak. Focus on these common areas for the fastest resolution.
The Bottle Seal and Insertion Check
Often, a leak near the bottle is a straightforward fix involving the bottle seal or how the bottle is connected.
- Inspect the Bottle Seal: Locate the rubber gasket or O-ring where the carbonating bottle connects to the machine. Wipe it clean with a damp cloth, removing any syrup residue or mineral buildup. Check for visible cracks, tears, or flattening. If it’s worn, a replacement seal is often the only permanent solution, though a quick clean might provide a temporary fix. You can gently apply a thin layer of food-grade lubricant to the seal to enhance its sealing capability.
- Re-insert the Bottle Correctly: This is critical. For screw-in bottles, ensure it’s screwed in firmly but not overtightened. For quick-snap models, pull the lever forward, push the bottle up and back until it clicks securely into place, ensuring there’s a slight gap between the bottle’s bottom and the machine’s base as per manufacturer guidelines. Improper insertion is a leading cause of leaks.
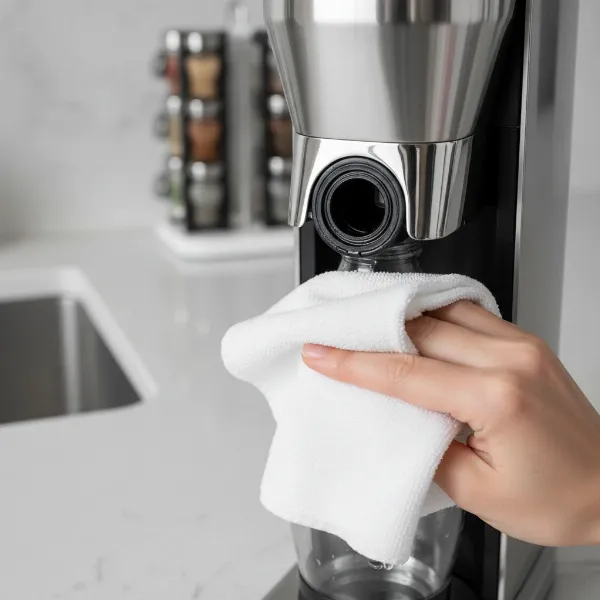 A close-up of a hand inspecting the rubber seal around a soda maker's bottle connection point, cleaning it with a cloth.
Examining the CO2 Cylinder Connection and Seals
Leaks can also originate from the CO2 cylinder connection point.
- Check Cylinder Seal: Once the CO2 cylinder is removed, inspect the small rubber O-ring or washer inside the machine’s cylinder receptacle. Clean it thoroughly. If it appears damaged, flattened, or missing, it will need to be replaced. A new, intact seal is crucial for preventing gas leakage.
- Ensure Tight Cylinder Connection: When re-inserting the CO2 cylinder, screw it in firmly until you feel resistance, but avoid excessive force which can damage the seal or threads. A proper, hand-tight connection is usually sufficient.
Quick Nozzle Assembly Inspection and Tightening
Some soda makers allow for minor adjustments to the nozzle assembly itself.
- Inspect External Fittings: If your soda maker has any visible external nuts or threaded connections around the nozzle assembly (more common on commercial or higher-end units), gently check if they are loose. Using a crescent wrench or soft-jaw pliers, carefully tighten them a quarter turn at a time until snug, being cautious not to over-tighten and strip threads.
- Look for Visible Debris/Clogs: Peer into the nozzle opening. If you see any visible debris or crystallized syrup, a gentle wipe with a damp cloth or a soft brush might help. Avoid poking anything sharp or hard into the nozzle, as this can cause damage.
The Carbonation Technique Refresh
Sometimes, the leak isn’t a mechanical fault but a direct result of how you carbonate.
- Fill to the Line, No More: Always ensure your water bottle is filled only to the designated fill line. Overfilling is a guaranteed way to cause an overflow from the nozzle.
- Carbonate Plain Water Only: Never carbonate water with added flavors. Add syrups after the carbonation process is complete.
- Use Short, Controlled Presses: Instead of holding the carbonation lever down continuously, use short (1-2 second) presses, releasing fully between each press. For most machines, 3 presses achieve a standard fizz, and 5 for a strong fizz. Listen for the distinct “buzz” or “hiss” sound, indicating optimal carbonation. This technique prevents excessive pressure buildup that can force water out.
“Many users mistakenly believe their machine is broken when a simple adjustment to their carbonation technique or bottle insertion can resolve the leak entirely. It’s often about understanding the subtle mechanics of pressure.” – Admin, Sodamakerpro.com, Soda Maker Technician
Preventing Future Leaks: Best Practices for Your Soda Maker
A little preventative care goes a long way in keeping your soda maker leak-free and extending its lifespan.
Regular Cleaning and Maintenance
Consistent cleanliness is your best defense against leaks caused by residue buildup.
- Wipe Down Seals: After each use, quickly wipe the bottle seal and the area where the CO2 cylinder connects to prevent residue buildup.
- Deep Clean Periodically: Every few weeks, perform a more thorough cleaning. Remove the bottle and CO2 cylinder. Use a damp cloth to clean the nozzle area, bottle rest, and any accessible crevices. For stubborn mineral deposits, a mixture of water and white vinegar can be effective, followed by a rinse with plain water. Always consult your machine’s manual for specific cleaning instructions.
- Inspect O-rings/Gaskets: During cleaning, take a moment to visually inspect all rubber seals for signs of wear, cracks, or hardening. Proactively replacing a slightly worn seal is much easier than fixing a major leak.
Mastering the Art of Carbonation
Adhering to correct operating procedures is paramount for leak prevention.
- Always Respect the Fill Line: Make it a habit to fill your carbonating bottle precisely to the fill line, no more, no less. This provides enough headspace for proper carbonation without overflow.
- Add Flavors Post-Carbonation: Instill the discipline of only carbonating plain, cold water. Flavors can clog nozzles and damage internal components not designed for sticky liquids under pressure.
- Consistent Carbonation Technique: Train yourself to use short, even presses. This ensures optimal carbonation pressure without over-pressurizing the system, which can strain seals and lead to leaks.
- Store Properly: When not in use, ensure the machine is dry and free of any residual water that could lead to calcification around the nozzle over time.
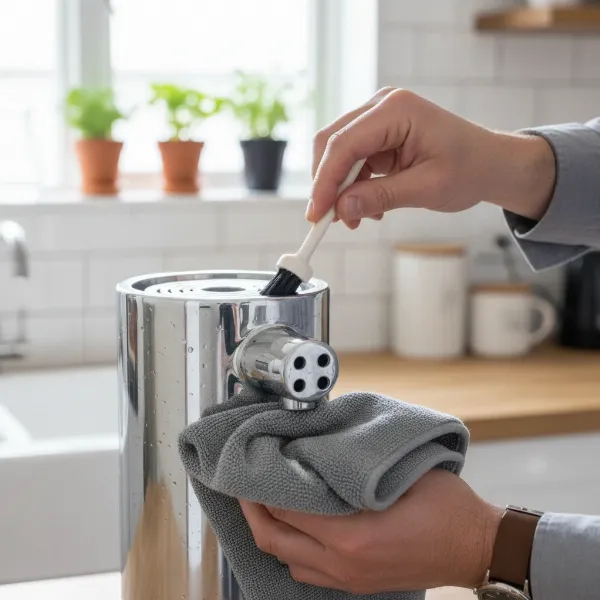 A person cleaning the nozzle of a soda maker with a small brush and cloth, emphasizing preventative maintenance.
When to Seek Professional Help or Consider Replacement
While many leaks are quick fixes, some issues may be beyond a simple 5-minute repair. If you’ve tried the troubleshooting steps above and the leak persists, or if you notice any of the following, it might be time for more serious action:
- Persistent Leak After All Steps: If you’ve cleaned seals, tightened connections, ensured proper technique, and the leak continues, there might be internal damage or a more complex component failure.
- Visible Cracks or Damage to Machine Housing: Any cracks in the plastic housing, especially around the nozzle or carbonation mechanism, usually indicate a more severe problem that DIY fixes cannot address.
- Difficulty Attaching/Removing Bottle/Cylinder: If the bottle or CO2 cylinder doesn’t attach smoothly, or if parts feel stripped, it could be a sign of internal misalignment or damage to critical connection points.
- Unusual Noises or Persistent Hissing: A loud, continuous hissing sound after carbonation (not the normal pressure release) or grinding noises could indicate a serious internal valve or pressure system malfunction.
In these situations, it’s best to contact the manufacturer’s customer support for advice or professional repair options. If your soda maker is old, continuously problematic, or replacement parts are unavailable, investing in a new unit might be the most economical and reliable solution in the long run.
Conclusion
A leaking soda maker nozzle doesn’t have to spell the end of your sparkling beverage journey. Most leaks are easily remedied by understanding common causes, performing quick inspections, cleaning seals, ensuring proper bottle insertion, and refining your carbonation technique. With these simple 5-minute fixes and a commitment to regular maintenance, you can swiftly resolve many issues, ensuring your soda maker continues to deliver perfect fizz every time. Don’t let a small leak dampen your spirits; a little attention can bring back the joy of homemade sparkling water. Which of these quick fixes will you try first to restore your soda maker to its optimal performance?
Frequently Asked Questions
My SodaStream leaks when I press the carbonation button. What’s the fastest fix?
The quickest solution is often to check the bottle’s fill line, ensure it’s filled with plain water only, and verify the carbonating bottle is correctly seated and locked into place. Also, try using shorter, pulsed presses on the carbonation button to avoid over-pressurizing the system.
Why does water spill out when I carbonate, even if the bottle isn’t overfilled?
If water spills despite proper filling, it often indicates an issue with the bottle’s seal or incorrect bottle insertion. Remove the bottle, clean the rubber gasket on the machine, and re-insert the bottle firmly according to your model’s specific locking mechanism.
How often should I clean my soda maker’s nozzle area to prevent leaks?
It’s recommended to quickly wipe down the bottle seal and nozzle area after each use to remove any residue. A more thorough cleaning, inspecting all seals for wear, should be done every few weeks to prevent mineral buildup and potential leaks.
Can a worn-out CO2 cylinder cause my soda maker to leak at the nozzle?
While less common, a faulty CO2 cylinder valve can sometimes release gas too quickly, leading to excessive pressure and leaks around the nozzle. If other fixes fail, try a new CO2 cylinder to rule out a defective canister as the cause.