Ever cracked open a can of sparkling water and wondered about the magic behind the bubbles? You might be surprised to learn that you can become the magician yourself, right in your own kitchen. If you’ve been asking yourself, What Is A Manual Carbonation system and how can it revolutionize the way you drink, you’ve come to the right place. Forget lugging heavy plastic bottles from the store. We’re about to pop the cap on the simple, satisfying process of making your own fizzy drinks on demand. It’s easier, cheaper, and more fun than you ever imagined.
So, What Exactly Is a Soda Maker and How Does It Work?
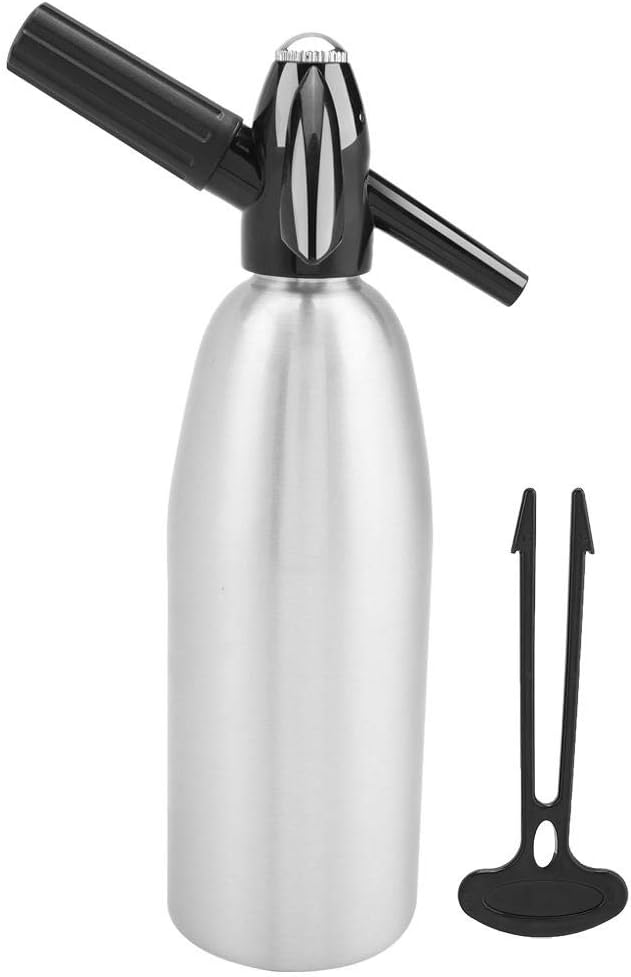
At its heart, a soda maker is a device that performs manual carbonation. In simple terms, manual carbonation is the process of infusing carbon dioxide (CO2) gas into a liquid, typically water, to make it bubbly or “carbonated.” The “manual” part is key—these countertop gadgets do their job without needing electricity. They’re powered by pure physics and a little bit of your own hand-pressure.
Think of it like this: the air we breathe has a tiny amount of CO2, but a soda maker uses a concentrated source. Here’s a breakdown of the key players:
- The Machine: This is the main unit that sits on your counter. It’s essentially a stylish stand designed to hold the CO2 cylinder and the carbonating bottle securely in place.
- The CO2 Cylinder: This is the heart of the operation. It’s a metal canister filled with food-grade, pressurized carbon dioxide gas. One cylinder can typically carbonate up to 60 liters of water.
- The Reusable Bottle: This is a specially designed, pressure-resistant bottle that you fill with water and attach to the machine.
The process is brilliantly simple. You fill the bottle with cold water, screw it into the soda maker, and then press a button or pull a lever. This action releases a controlled burst of CO2 from the cylinder directly into the water. Under pressure, the CO2 gas dissolves into the water. When you release the bottle, you hear that satisfying psssst sound—that’s the excess pressure being released, and voilà, you have sparkling water. The bubbles are born!
The Undeniable Benefits of Making Your Own Bubbly
Switching to a home soda maker isn’t just a fun novelty; it’s a genuine lifestyle upgrade. Once you start, you’ll wonder how you ever lived without it.
Say Goodbye to Overpriced Bottles
Let’s talk numbers. A daily sparkling water habit can add up quickly. A home carbonation system is a one-time investment that pays for itself over and over.
| Item | Store-Bought Sparkling Water (1L/day) | Soda Maker Pro (1L/day) |
|---|---|---|
| Daily Cost | ~$1.50 | ~$0.25 (cost of CO2 per liter) |
| Annual Cost | $547.50 | $91.25 |
| Annual Savings | – | $456.25 |
The math doesn’t lie. You save a significant amount of money while enjoying unlimited access to fresh, fizzy drinks.
Be a Hero for the Planet
Every time you carbonate a bottle of water at home, you’re preventing a single-use plastic bottle from entering the waste stream. The average family can eliminate thousands of bottles and cans over the lifespan of a single soda maker. It’s one of the easiest and most impactful changes you can make to reduce your household’s environmental footprint.
Take Control of Your Health
Store-bought sodas and even some flavored sparkling waters are often loaded with sugar, high-fructose corn syrup, and artificial ingredients you can’t even pronounce. With a soda maker, you are in complete control.
“The beauty of manual carbonation is the absolute control it gives back to the consumer,” notes Dr. Alistair Finch, a beverage science consultant. “You’re starting with a pure, clean base—water—and deciding exactly what, if anything, goes into it. It’s a shift from passive consumption to active creation.”
Want plain, crisp seltzer? You’ve got it. Craving a hint of flavor? Add a squeeze of fresh lime or a splash of natural fruit juice. No hidden sugars, no surprise chemicals.
The Ultimate Convenience
Imagine this: it’s a hot day, and you’re craving a cold, bubbly drink. Instead of a trip to the store, you walk to your kitchen counter and have a perfectly carbonated beverage in under 30 seconds. That’s fizz on demand. No more lugging heavy cases of water or running out at the worst possible moment.
|
Our Picks for the Best Soda Maker in 2026
As an Amazon Associate, we earn from qualifying purchases.
|
||
| Num | Product | Action |
|---|---|---|
| 1 | Sparkling Water Maker, 1L Soda Siphon, Aluminum Sodastream Soda Makers for Home, Portable Water Maker for Soda Water, Cocktails or Soda Water, Use 8 gram CO2 Cartridges(Not Included) |

|
| 2 | Aarke Carbonator lll with CO2 Cylinder, Sparkling & Carbonation Water Machine, Stainless Steel with PET BPA-Free Reusable Bottle Volume 1L/34 fl oz (Matte White) |
|
| 3 | SodaStream - Terra Soda Streaming Machine - STARTER KIT - Sparkling Water Maker with CO2 & Bubly Drop - Eco-Friendly, No Batteries Needed - Black |
|
| 4 | iSi North America Classic Sodamaker Set with Soda Siphon Chargers, 50-Pack - Stainless Steel 1-Quart Sparkling Water System & CO2 Carbonation Chargers for Carbonated Drinks, Juices, Cocktails |
|
| 5 | The Carbon8 Pulse Soda Maker Machine, Premium OmniFizz Sparkling Water Maker, Seltzer & More, Soda Stream Machine for Home, Water Carbonator, Fizz Infuser (CO2 Cylinder Not Included), Black |
|
| 6 | Philips Soda Streaming Machine, Stainless Sparkling Water Maker Easy Install with Quick Twist 1L PET Carbonating Bottle, Soda Maker Compatible with 60L CO2 Carbonator (NOT Included), ADD4902BKOQ/37 |
|
| 7 | Aarke Carbonator Pro, Sparkling & Carbonation Water Machine, Stainless Steel with Glass Reusable Bottle Volume 800 mL/27 fl oz (Stainless Steel) |
|
| 8 | iSi North America Classic Sodamaker, 1 Quart - Stainless Steel Carbonation System for Sparkling Water, Fresh Beverages, Handcrafted Cocktails - Portable & Professional Soda Maker for Restaurant Use |
|
| 9 | Portable Sparkling Water Maker - Travel Soda Maker for Home & Outdoor, 1L Carbonating Bottle, 10 pcs CO2 Cylinders, Compact Carbonated Water Machine for Flavored Drinks, Soda Machine (Red) |
|
| 10 | Sparkling Water Maker, Soda Streaming Machine with 1L BPA-Free Carbonation Bottle, Makes Home Fizzy Drinks, Seltzer Carbonated Water Maker, Compatible with Standard 60L CO2 Carbonators (Not Included) |
|
How to Choose the Right Soda Maker For You
With a few options on the market, picking the right one comes down to your personal needs and preferences. Here are a few things to consider:
- Carbonation Control: Do you prefer a light spritz or an aggressive, tongue-tingling fizz? Some models offer adjustable carbonation levels, letting you customize each bottle to your exact liking.
- Bottle Material: Most soda makers use BPA-free plastic bottles, which are lightweight and durable. Some premium models offer elegant glass carafes, which are dishwasher-safe and look great on a dinner table.
- Size and Aesthetics: Your soda maker will live on your countertop, so pick one that fits your space and matches your kitchen’s style. They come in various colors and finishes, from sleek black to vibrant red.
- Ease of Use: Look for models with simple, intuitive mechanisms, like a snap-lock bottle attachment that makes the process quick and effortless.
Getting Started: Your First Bottle of Fizz in 5 Easy Steps
Ready to make some bubbles? The process is incredibly straightforward. Let’s walk through what is a manual carbonation process from start to finish.
- Fill ‘Er Up: Start with cold water. This is a crucial tip! Cold water absorbs CO2 much more effectively, resulting in a fizzier drink. Fill your carbonating bottle to the marked fill line.
- Lock It In: Insert the bottle into the soda maker. Depending on your model, you might need to screw it in or simply push it up until it clicks into place.
- Press for Fizz: This is the fun part. Firmly press the carbonation button in short, 1-2 second bursts. Most people find 3 presses create a standard fizz, while 5 or more will give you an extra-bubbly result. You’ll hear a buzzing sound with each press.
- Release the Pressure: Once you’ve reached your desired fizz level, wait a moment. Then, gently pull the bottle towards you or press a release button to vent the excess pressure.
- Enjoy and Flavor: You can now unscrew your bottle of perfectly sparkling water. Drink it as is, or add your favorite flavors. A squeeze of lemon, a few muddled berries, or a splash of a Soda Maker Pro natural syrup can turn your seltzer into a gourmet soda.
Pro Tips and Creative Drink Ideas
Your soda maker is a gateway to a universe of beverage creativity. Don’t just stop at water!
- Infused Sparkling Water: Before carbonating, add cucumber ribbons, mint leaves, or orange slices to your water bottle. Let it infuse in the fridge for an hour, then carbonate for a refreshing, spa-like drink.
- Healthy Homemade Sodas: Mix a small amount of 100% fruit juice (like cranberry or pomegranate) into your sparkling water after carbonating for a delicious, low-sugar soda alternative.
- Sparkling Iced Tea & Coffee: Brew a strong batch of your favorite tea or coffee, let it cool completely in the fridge, and then carbonate it for a bubbly, energizing pick-me-up.
- Crafty Mocktails: Muddle some fresh raspberries and basil in a glass, top with your homemade sparkling water, and add a squeeze of lime. You’ve just made a sophisticated, non-alcoholic drink perfect for any occasion.
A Word of Caution: Only carbonate water in your machine. Adding syrups, juice, or other ingredients to the bottle before carbonating can cause excessive foaming, make a sticky mess, and potentially damage your machine. Always add flavors after the fizz!
Keeping Your Machine in Tip-Top Shape
Maintaining your soda maker is incredibly easy. A little care will ensure it gives you perfect bubbles for years to come.
- The Bottles: Hand-wash your carbonating bottles with warm water and a little dish soap. Avoid the dishwasher unless they are specifically marked as dishwasher-safe (like glass carafes), as high heat can damage the plastic.
- The Machine: Simply wipe down the exterior with a damp cloth if it gets splashed. Pay special attention to the nozzle where the gas comes out to ensure it stays clean.
- The CO2 Cylinder: When your cylinder is empty, you don’t just throw it away. Most manufacturers and many major retailers (like Target or Bed Bath & Beyond in the US) have an exchange program. You bring in your empty cylinder and get a full one at a discounted price.
Frequently Asked Questions (FAQ)
Q: Can I carbonate liquids other than water?
A: It’s strongly recommended to only carbonate plain water. Carbonating other liquids can create a huge, sticky foam-over that can clog and damage the machine’s internal mechanisms and will likely void your warranty. Add your flavors after carbonating.
Q: How long does a CO2 cylinder last?
A: A standard 60L cylinder will carbonate up to 60 liters of water. The exact amount depends on how fizzy you like your drinks. If you prefer a very high level of carbonation, you might get closer to 50 liters per cylinder.
Q: Is homemade sparkling water really cheaper?
A: Absolutely. After the initial investment in the machine, the cost per liter is just the price of the CO2 refill, which is significantly cheaper than buying pre-packaged bottles. Our cost comparison table above shows the savings are substantial.
Q: Are the reusable plastic bottles safe?
A: Yes, the bottles provided by reputable brands like Soda Maker Pro are made from high-quality, BPA-free PET plastic. They are designed to withstand the pressure of carbonation and are perfectly safe for repeated use up to their expiration date (usually printed on the bottle).
Q: How do I know when my CO2 cylinder is empty?
A: You’ll notice the answer to “what is a manual carbonation machine’s power” when it’s gone. When you press the carbonation button, you’ll hear a much weaker sputtering sound, or no sound at all, and very few bubbles will appear in your water. That’s your sign it’s time for an exchange.
Your Journey into a World of Bubbles Awaits
So, what is a manual carbonation system? It’s your ticket to endless, customizable, and healthy fizzy drinks. It’s a smart investment that saves you money, helps the environment, and puts you in the driver’s seat of your own hydration. By embracing the simple power of CO2, you can unlock a new level of convenience and creativity in your kitchen. The only question left is: what bubbly creation will you make first?